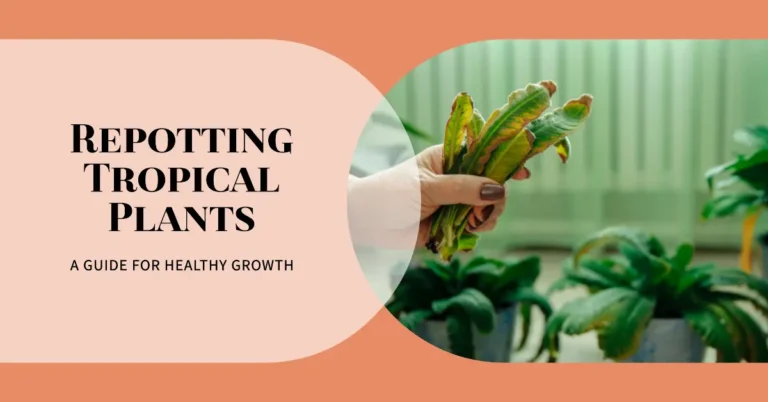
Aloe Vera Repotting Guide
Overview
What is repotting?
Repotting is the process of transferring a plant from one pot to another. It is an important step in the care of houseplants, including Aloe Vera. Repotting allows the plant to have more space for root growth and ensures proper drainage. It also gives you an opportunity to refresh the potting mix and remove any dead or damaged roots. By repotting your Aloe Vera, you are giving it the chance to thrive and continue to beautify your home. So, let’s dive into the Aloe Vera repotting guide and learn how to give your plant the best care possible!
Why is repotting important?
Repotting is an essential task for the health and well-being of your Aloe Vera plant. It allows the plant to have enough space for its roots to grow and absorb nutrients efficiently. Additionally, repotting also helps prevent the plant from becoming root-bound, which can lead to stunted growth and decreased vitality. By repotting your Aloe Vera regularly, you ensure it has the best possible conditions to thrive and continue providing numerous benefits.
When should you repot your aloe vera?
When it comes to repotting your aloe vera plant, timing is everything. You’ll want to watch for a few key signs indicating it’s time for a new pot. If you notice that your aloe vera has outgrown its current container or its roots are starting to become overcrowded, it’s a good indication that repotting is necessary. Additionally, if you see that the soil is not draining properly or there is a buildup of salts and minerals, it’s time to give your aloe vera a fresh start. Remember, aloe vera plants thrive when they have enough space to grow, and their roots have room to breathe. So, don’t hesitate to repot your aloe vera when it needs it – it will thank you with healthy, vibrant leaves and a thriving appearance.
Choosing the Right Pot

Importance of Size
Size is more than just a matter of space; it directly impacts your plant’s health. A pot that’s too small will restrict root growth and lead to root-bound conditions. On the other hand, a pot that’s too large can result in waterlogged soil, a condition that could lead to root rot. Aim for a pot that is 1-2 inches larger in diameter than the current one.
Why Drainage Matters
Drainage holes are an essential feature in your new pot. They ensure that excess water drains away, preventing waterlogged conditions. Your plant’s roots should never be submerged in water, as this can lead to root rot.
Material Choices
Your choice of pot material can also affect your Aloe Vera’s health. Clay pots are breathable and good for drainage. In contrast, plastic pots are lighter and easier to move around. The key is to ensure whatever you pick has good drainage holes.
Quick Comparison Table:
| Pot Material | Pros | Cons |
|---|---|---|
| Clay | Good drainage, breathable | Heavy, can break easily |
| Plastic | Lightweight, durable | Less breathable |
Preparing the Aloe Vera

Watering the plant
Watering the plant is an essential part of caring for your Aloe Vera. It is important to provide the plant with just the right amount of water to thrive. Overwatering can lead to root rot and other issues, while underwatering can cause the leaves to become dry and shriveled. To ensure proper watering, it is recommended to use well-draining soil and a pot with drainage holes. This allows excess water to escape and prevents waterlogged roots. When watering, make sure to thoroughly saturate the soil until water drains out of the bottom of the pot. However, avoid leaving the plant in standing water as it can lead to root rot. It is best to water your Aloe Vera when the top inch of soil feels dry to the touch. Remember, a happy and healthy Aloe Vera is a hydrated Aloe Vera!
Trimming the roots
When it comes to trimming the roots of your aloe vera plant, it’s important to approach this task with care and precision. Start by gently removing the plant from its current pot, being mindful not to damage the delicate roots. Once the plant is free, take a sharp pair of scissors or pruning shears and carefully trim away any dead or damaged roots. Be sure to only remove what is necessary, as over-trimming can harm the plant. After trimming, repot your aloe vera in a slightly larger pot with fresh, well-draining soil. This will give the plant room to grow and thrive. Remember to water the newly repotted aloe vera sparingly and provide it with ample sunlight to ensure its continued health and vitality.
Loosening the soil
When it comes to loosening the soil for repotting your Aloe Vera plant, it’s important to be gentle yet thorough. Start by using a hand trowel or a fork to carefully break up any compacted soil around the plant’s roots. Be sure to avoid damaging the roots in the process. Once the soil is loosened, you can remove the plant from its current pot and proceed with repotting. Remember, a well-draining soil mix is essential for the health and growth of your Aloe Vera plant, so take the time to ensure the soil is properly loosened before proceeding.
Aloe Vera Repotting Process

Removing the plant from the old pot
When it comes to removing the plant from the old pot, it’s important to handle the aloe vera with care. Start by gently loosening the soil around the edges of the pot using a small trowel or your hands. Be careful not to damage the roots or break any of the leaves. Once the soil is loose, turn the pot upside down and tap the bottom to release the plant. If the plant is stuck, you can use a butter knife to carefully loosen it. Remember to be patient and take your time to ensure the plant is safely removed from the old pot without any harm. By following these steps, you’ll be ready to repot your aloe vera and give it a fresh start in its new home.
Inspecting the roots
Inspecting the roots is an important step when repotting your aloe vera plant. By carefully examining the roots, you can determine if they are healthy and in need of repotting. Start by gently removing the plant from its current pot and gently untangling the roots. Look for any signs of rot, such as dark or mushy roots, and remove them with clean scissors or pruning shears. Healthy roots should be firm and white or light brown in color. It may be a good time to repot your aloe vera plant if you notice any overcrowding or tangling of the roots. Remember to handle the roots with care to avoid damaging them and ensure the overall health of your plant.
Placing the plant in the new pot
When placing the plant in the new pot, it’s important to choose a pot that is slightly larger than the current one. This will allow the roots to have room to grow and prevent them from becoming root-bound. Before placing the plant in the new pot, make sure to prepare the potting mix by mixing equal parts of potting soil, perlite, and sand. Gently remove the plant from its current pot, being careful not to damage the roots. Place the plant in the new pot and fill in the gaps with the prepared potting mix, making sure to firmly press it down. Finally, water the plant thoroughly and place it in a location with bright, indirect sunlight. Following these steps ensures your aloe vera plant will thrive in its new pot.
Caring for the Repotted Aloe Vera

Watering after repotting
After repotting your aloe vera plant, it is important to properly water it to ensure its health and growth. Watering is a crucial step in the repotting process, as it helps the plant settle into its new environment and promotes root development. In the case of aloe vera plants in a vegetable garden, it is essential to provide adequate moisture to support their growth. Proper watering techniques include thoroughly soaking the plant, allowing the soil to dry out slightly between waterings, and avoiding overwatering. Following these watering guidelines can help your aloe vera plant thrive in your vegetable garden.
Providing adequate sunlight
Aloe vera plants thrive in bright, indirect sunlight. They require at least six hours of sunlight per day to grow healthy and strong. Place your aloe vera plant near a sunny window or in a spot where it can receive ample sunlight. If you notice your plant leaning towards the light, rotate it every few days to ensure even growth. Remember to protect your aloe vera from intense, direct sunlight, as it can cause the leaves to burn. Providing adequate sunlight will help your aloe vera plant thrive and flourish!
Fertilizing the plant
Fertilizing the plant is an essential step in caring for your aloe vera. Providing the right nutrients will help your plant grow healthy and strong. When fertilizing, choose a balanced fertilizer specifically designed for succulent plants. Follow the instructions on the packaging for the correct dosage and frequency. Remember to water your aloe vera before applying fertilizer to prevent any potential root burn. With regular fertilizing, your aloe vera will thrive and reward you with beautiful, vibrant leaves.
Conclusion: Aloe Vera Repotting

Benefits of repotting
Repotting your Aloe Vera plant offers several benefits. Firstly, it allows the plant to grow and expand its root system, which promotes overall plant health. Additionally, repotting provides an opportunity to refresh the soil, removing any built-up salts or toxins that may have accumulated over time. This helps to ensure that your Aloe Vera plant receives the necessary nutrients for optimal growth. Lastly, repotting allows you to check the condition of the roots and remove any damaged or rotting parts, preventing potential issues in the future. By repotting your Aloe Vera plant, you are giving it the best chance to thrive and flourish in its new pot. So go ahead and give your Aloe Vera plant a fresh start by repotting it!
Enjoying a healthy aloe vera
Aloe vera is a versatile plant that offers a range of health benefits. Whether using it to soothe sunburned skin or add it to your favorite smoothie, this succulent is a must-have in any home. But to truly enjoy the benefits of a healthy aloe vera, it’s important to give it the proper care and attention it deserves. Repotting your aloe vera plant is crucial in ensuring its continued growth and vitality. By following this simple guide, you’ll be well on your way to enjoying a healthy aloe vera that thrives in your home.
Maintaining the plant’s growth
Maintaining the plant’s growth is essential to ensure your aloe vera thrives. Here are some tips to help you keep your plant healthy and happy. Firstly, ensure your plant has the right amount of sunlight. Aloe vera plants love bright, indirect light, so placing them near a window is ideal. Additionally, water your plant regularly, but be careful not to overwater it. Aloe vera plants prefer well-draining soil, so make sure the pot has drainage holes. Lastly, occasionally fertilize your plant with a balanced houseplant fertilizer to provide the necessary nutrients. Following these simple steps, you can enjoy a beautiful and thriving aloe vera plant in your home.
In conclusion, Everything Tropical Plants is your ultimate destination for all things related to nurturing your green oasis. Whether you’re a seasoned plant enthusiast or just starting your journey into the world of tropical plants, our website offers a wealth of information, tips, and resources to help you create and maintain your own tropical paradise. From plant care guides to expert advice, we’ve got you covered. Visit Everything Tropical Plants today and embark on a journey of discovery and growth with us.
FAQs
When should I repot my Aloe Vera plant?
The optimal time to repot your Aloe Vera is during the spring, as this is when the plant is in its active growth phase. Although you can repot at other times, spring is most conducive to helping your plant thrive.
What kind of soil should I use for repotting?
A lightweight cactus potting mix is generally recommended for Aloe Vera plants. Make sure your planter pot also has effective drainage holes. Alternatively, a mix of one-part perlite and two-part peat-free potting mix works well.
How do I repot Aloe Vera pups?
Aloe Vera plants frequently produce baby plants, or “pups.” To repot these, carefully separate them from the parent plant and allow them to dry for about a day. Then, you can plant them in their new pots.
Should I use a wider or deeper pot for repotting?
Go for a wider pot rather than a deeper one. Aloe Vera plants have relatively shallow root systems, so a wider pot gives the roots more room to spread.
How often should I water my Aloe Vera plant after repotting?
After repotting, let the soil dry out completely before watering your Aloe Vera again. Overwatering is a common mistake that can lead to root rot.
Do Aloe Vera plants need a lot of sun after repotting?
Aloe Vera plants require bright but indirect sunlight. After repotting, place the plant where it can get adequate light without direct sun exposure, which can burn the leaves.
What is the best time of year to repot an Aloe Vera plant?
Spring is generally considered the best time for repotting Aloe Vera. This is when the plant is most active and can best adapt to a new environment.
How do I know if my Aloe Vera plant needs to be repotted?
Signs that your Aloe Vera needs repotting include an overcrowded pot, roots growing through the drainage holes, or water sitting on the surface of the soil due to poor drainage.
What type of soil is best for repotting Aloe Vera plants?
A free-draining soil mix, like a cactus potting mix, is ideal. You can also create your own mix with one part perlite and two parts peat-free potting mix.
Can I repot Aloe Vera in winter?
It’s possible but not recommended. The plant is less active during winter, making adapting to new conditions more challenging.
What type of fertilizer should I use after repotting?
A balanced, succulent-specific fertilizer is best for Aloe Vera plants. Always water the plant before applying fertilizer to minimize the risk of root burn